使用HTTP的
1. 浏览器使用代理
现在不需要输入任何命令,就可以在浏览器中设置http代理了。这里不能选择HTTPS
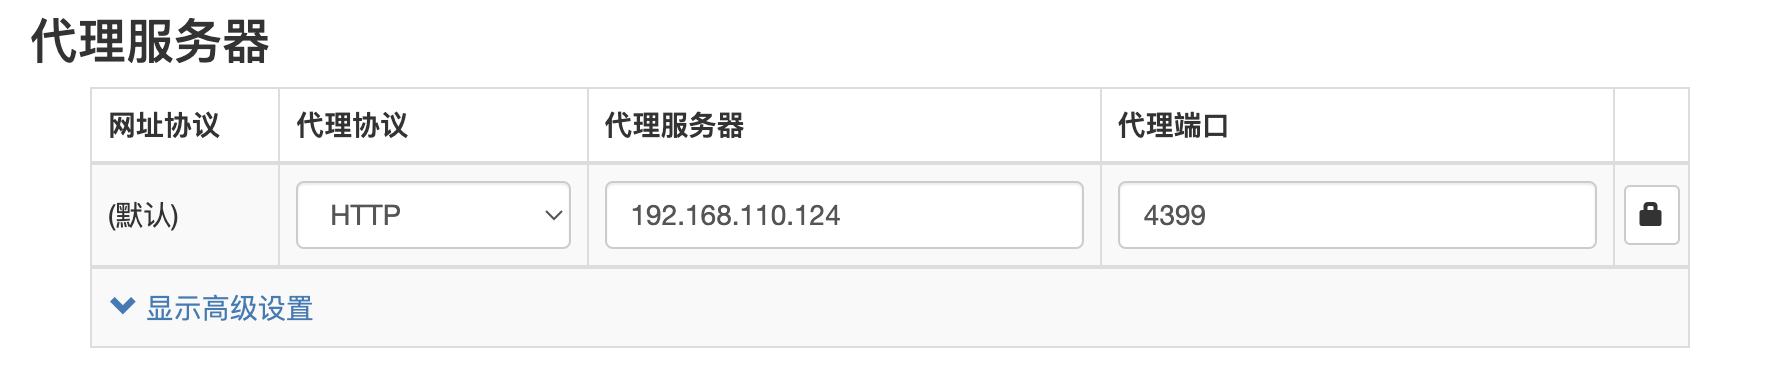
这里假设能上网的机器即安装squid的机器的ip是192.168.110.124。
如果squid设置了密码,可以点击右边的 锁 标志, 会提示输入用户名和密码。
如果这样写的是http://www.myserver.com的话,代理协议选HTTP,代理服务器不能加http://,代理服务器应该写www.myserver.com
2. 命令行使用代理(亲测)
如果是用clash,在http_proxy=172.18.8.106:9090上打开allow lan
2.1 wget使用代理
Bash
这里网站中的http与http_proxy必须对应。
wget http://www.baidu.com -e "http_proxy=192.168.110.124:4399"
wget https://www.baidu.com -e "https_proxy=192.168.110.124:4399"

wget http://www.baidu.com -e "http_proxy=172.18.8.106:7890"
如果在命令行中已经设置了export,则使用wget时无需再使用-e参数。
2.2 pip使用代理(亲测)
也可以使用
Bash
export http_proxy=192.168.110.124:4399
export https_proxy=192.168.110.124:4399
如果用的是clash,可能是以下
export http_proxy=http:172.0.0.1:47890
export https_proxy=http:172.0.0.1:47890
2.3 apt-get(亲测可用)
Text Only
sudo apt-get -o Acquire::http::proxy="http://127.0.0.1:4399/" update
sudo apt-get -o Acquire::http::proxy="http://192.168.110.124:4399/" update
sudo apt-get -o Acquire::http::proxy="http://172.18.8.106:3128/" update
### 2.4 VSCode使用
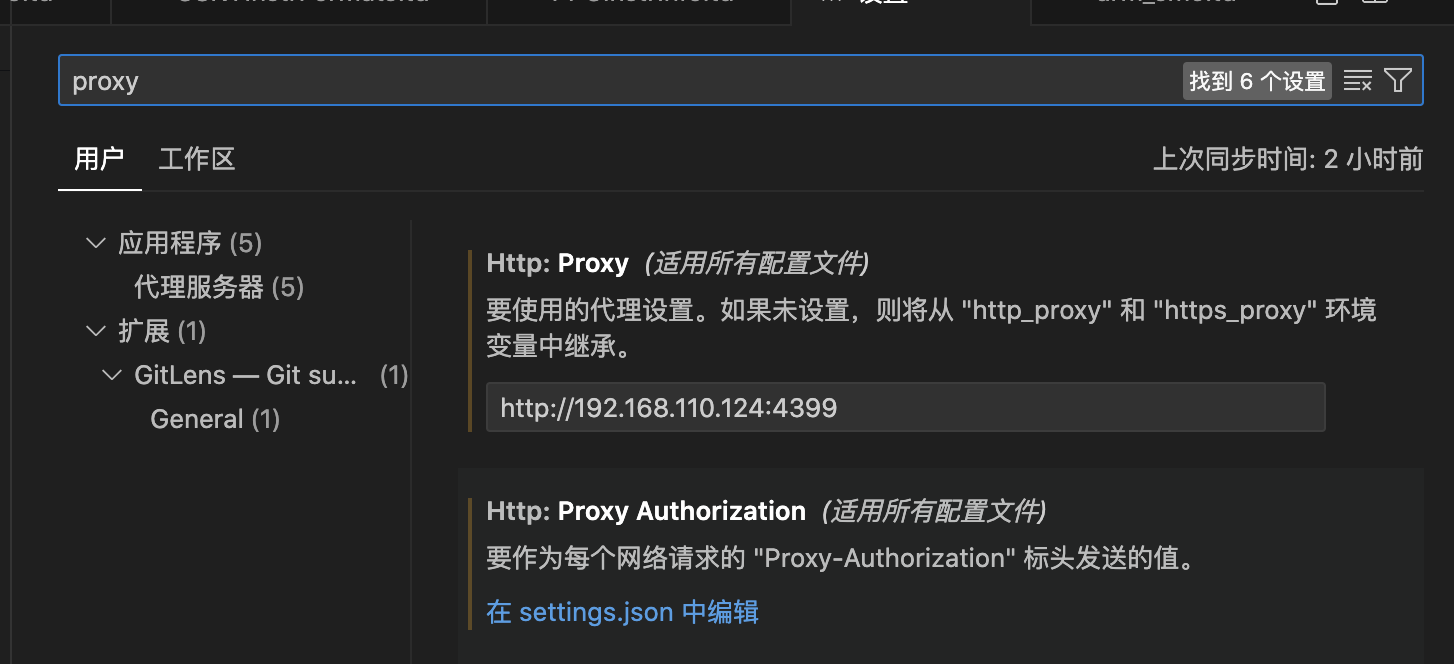
打开设置 -> 搜 proxy,只在Http:Proxy中输入即可